Confirm Receipt
If you have received the Transfer Appliance for data ingestion in cloud, follow these steps in the Google Cloud console:
Ensure you have the following permissions:
- transferappliance.appliances.update
- transferappliance.orders.get
- transferappliance.orders.update
You will be able to get these required permissions through custom roles or predefined roles. You can search for predefined roles for a given permission.
Go to appliances page and select the appliance.
Open the Setup Checklist.
Navigate to the "Track Shipment and Confirm Receipt" task.
Click on the "Confirm Receipt" button. This will open a popup box to confirm the receipt.
Ensure that you click the "Confirm Receipt" button in the popup box only if you have indeed received the appliance, as this action will mark the appliance as "ON_SITE."
Verify the package contents
Before connecting Transfer Appliance, we strongly recommend that you verify that the package arrived intact, with all required cables and equipment. We ensure you have everything necessary for a successful data transfer.
After receiving Transfer Appliance, verify that package contents are intact by doing the following:
TA7
Confirm that the shipping case and tamper-evident seals are intact.

Break or cut the tamper-evident wire tags using side cutters or other wire cutting tool capable of cutting a wire with a diameter of 2.5 millimeters (0.1 in). Open the shipping case.

Contact the Transfer Appliance Team if any of the following items are missing:
Item Description 
Envelope with shipping pouch, zip tie, and tamper-evident tags 
2 power cables 
2 power extension cables 
Ethernet cable 
Transfer Appliance 
2 power bricks in a frame 
Dust cover, with key taped to the back
Rackable TA40 and TA300
Confirm that the shipping case and tamper-evident seals are intact.

Break or cut the tamper-evident wire tag using side cutters or other wire cutting tool capable of cutting a wire with a diameter of 2.5 millimeters (0.1 in). Open the shipping case.
Contact the Transfer Appliance Team if any of the following items are missing:
Item Description 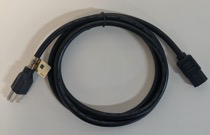
NEMA 5-15p to C13 power cable 
C14 to C13 power cable, for connections to the power distribution unit (PDU) 
Category 6 (Cat6) network cable 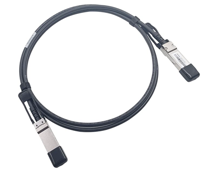
QSFP+ Twinax copper network cable 
QSFP+ to 4xSFP+ network cable 
USB-to-serial adapter cable – use only if instructed by Transfer Appliance Team 
Pin-to-socket serial adapter 
Wire tamper-evident tag 
Tie-on tag 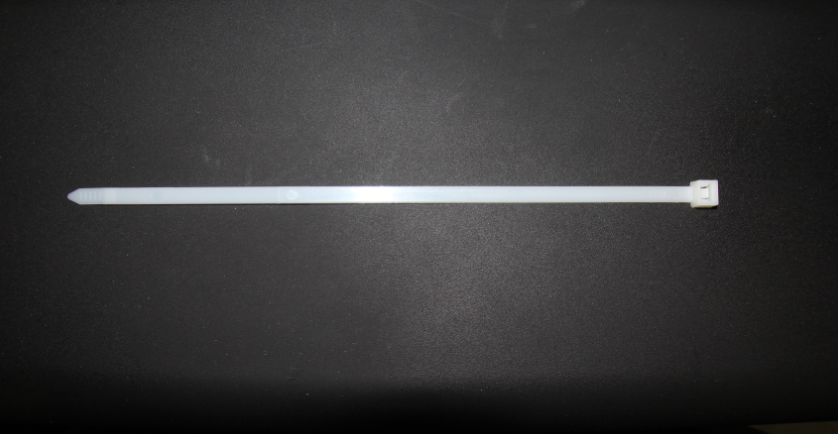
Zip tie 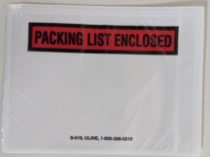
Shipping-label pouch 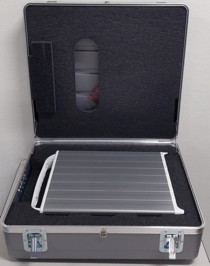
Transfer Appliance
Freestanding TA40 and TA300
Confirm that the shipping case and tamper-evident seals are intact.

Break or cut the tamper-evident wire tag using side cutters or other wire cutting tool capable of cutting a wire with a diameter of 2.5 millimeters (0.1 in). Open the shipping case.
Contact the Transfer Appliance Team if any of the following items are missing:
Item Description 
NEMA 5-15p to C13 power cable 
C14 to C13 power cable, for connections to the power distribution unit (PDU) 
Category 6 (Cat6) network cable 
QSFP+ Twinax copper network cable 
QSFP+ to 4xSFP+ network cable 
USB-to-serial adapter cable – use only if instructed by Transfer Appliance Team 
Pin-to-socket serial adapter 
Wire tamper-evident tag
Validate the appliance
Before connecting the appliance to your network, you must run a small application on your laptop to validate that the appliance hasn't been tampered with during shipping.
The Transfer Appliance Attestation Application supports the following 64-bit operating systems:
- Linux kernel 2.6.23 or later
- Microsoft Windows Server 2012 or later
- Microsoft Windows 10
- Apple macOS 10.11 or later
To validate the appliance, do the following:
Connect the appliance:
TA7
Connect the ethernet cable between your laptop and the configuration port (port 3) on the front of the appliance:

Connect the power bricks to the 2 power sockets on the rear of the appliance, and plug them into a power source using the supplied cables:

Rackable TA40 and TA300
Connect a Cat6 cable between the left network port and your laptop.
Connect the supplied power cable to the power socket on the appliance and to an open power socket on a power distribution unit (PDU).

Freestanding TA40 and TA300
Connect a Cat6 cable between the left network port and your laptop.

Connect the supplied power cable to the power socket on the appliance and to an open power socket on a power distribution unit (PDU).

Power on Transfer Appliance.
Use
pingto verify that you can contact the appliance through its configuration port:ping 169.254.20.1
The following sample response resembles the output that is returned:
PING 169.254.20.1 (169.254.20.1) 56(84) bytes of data.
64 bytes from 169.254.20.1: icmp_seq=1 ttl=64 time=0.060 ms
64 bytes from 169.254.20.1: icmp_seq=2 ttl=64 time=0.039 ms
64 bytes from 169.254.20.1: icmp_seq=3 ttl=64 time=0.039 ms
^C
--- 169.254.20.1 ping statistics ---
3 packets transmitted, 3 received, 0% packet loss, time 2045ms
rtt min/avg/max/mdev = 0.039/0.046/0.060/0.009 ms
To download the Transfer Appliance Attestation Application to your laptop, do the following:
Microsoft Windows
Download the Transfer Appliance Attestation Application to your laptop.
Open a Command Prompt, and navigate to the location where you downloaded the Transfer Appliance Attestation Application.
To validate the appliance, run the following command on your laptop:
taattestator_x86_64-windows.exe
Linux
On your laptop, open a terminal app.
To download the Transfer Appliance Attestation Application, run the following command on your laptop:
wget https://storage.googleapis.com/transferappliance/attestator/taattestator_x86_64-linux
Run the following commands on your laptop to validate the appliance:
chmod 0777 taattestator_x86_64-linux
./taattestator_x86_64-linux
Apple macOS
Open the Terminal app.
Run the following command on your laptop to download the Transfer Appliance Attestation Application:
curl -O https://storage.googleapis.com/transferappliance/attestator/taattestator_x86_64-darwin
Run the following commands on your laptop to validate the appliance:
chmod 0777 taattestator_x86_64-darwin
./taattestator_x86_64-darwin
If the appliance was not tampered with during shipment, the app will return a Transfer Appliance Attestation Passcode.
For data export appliance, once you have received the Transfer Appliance Attestation Passcode in the previous step, look for the email titled "Google Transfer Appliance Delivered and Validation Steps" with instructions for submitting the Transfer Appliance Attestation Passcode and receiving the credentials. Skip next step for data export order.
For offline and online appliance, once you have received the Transfer Appliance Attestation Passcode in the previous step, proceed with the following instructions:
Ensure you have the following permissions: * transferappliance.appliances.update * transferappliance.credentials.get
You will be able to get these required permissions through custom roles or predefined roles. You can search for predefined roles for a given permission.
- Go to appliances page and select the appliance.
- Open the Setup Checklist.
- Locate and select the "Check Integrity" task.
- Submit the Transfer Appliance Attestation Passcode returned by the appliance. In case of an incorrect entry, attempt to re-enter the correct code.
- Click on the "Get Credentials" button to retrieve the login credentials.
If the device was not tampered with during shipping, the credentials will be displayed in the Google Cloud console. Otherwise, the Google Cloud console will display an error message. If you encounter an error, contact the Transfer Appliance Team at [email protected] for assistance.
Connect to Transfer Appliance
You need the login details for the appliance to connect to it. The Transfer Appliance Team provides the appliance login details in exchange for a Transfer Appliance Attestation Passcode that indicates the appliance wasn't tampered with during shipping.
After you have the login details, connect the appliance to your network:
TA7
Keep the Cat6 cable connected between the configuration port (port 3) and your laptop.
Connect an ethernet cable between the left-most port 1 on the appliance, and an open RJ45 port that's connected to your network.

Rackable TA40 and TA300
Keep the Cat6 cable connected between the left network port and your laptop.
Connect a Cat6 cable to the right network port and to an open RJ45 port that's connected to your network.

Freestanding TA40 and TA300
Keep the Cat6 cable connected between the left network port and your laptop.
Connect a Cat6 cable to the right network port and to an open RJ45 port that's connected to your network.

- Connect to the appliance:
Windows
- Open Putty.
- For Connection type, select SSH.
-
In the Host Name field, enter:
169.254.20.1 - For Connection type, verify that SSH is selected.
- Click Open.
- Enter the username provided by Transfer Appliance Team when prompted.
- Enter the password provided by Transfer Appliance Team when prompted.
Linux
-
Run the following command:
ssh USERNAME@169.254.20.1Replacing
USERNAMEwith the username provided by Transfer Appliance Team. - Enter the Transfer Appliance password when prompted.
Mac
-
Run the following command:
ssh USERNAME@169.254.20.1Replacing
USERNAMEwith the username provided by Transfer Appliance Team. - Enter the Transfer Appliance password when prompted.
A freestanding appliance displays Ready for setup on the status screen
after you connect to the appliance.
Configure appliance software
Before you transfer data to the Transfer Appliance you must verify the status of the appliance and configure the software on the appliance to work on your network.
To configure the appliance's software, follow the instructions below:
Verify the status of the appliance by running the following command from your laptop or workstation connected to the appliance:
ta status
The following sample response resembles the output that is returned:
TA7
You are ready to configure the appliance.

Next steps:
» Configure the appliance using one of the following commands:
> ta config --data_port=RJ45 --ip=dhcp

» To set a static IP address and gateway, use the '--ip' and '--gw' flags. For example:
> ta config --data_port=RJ45 --ip=192.168.0.100/24 --gw=192.168.0.1
TA40 and TA300
You are ready to configure the appliance.

Next steps:
» Configure the appliance using one of the following commands:
> ta config --data_port=RJ45 --ip=dhcp
> ta config --data_port=QSFP --ip=dhcp
» To set a static IP address and gateway, use the '--ip' and '--gw' flags. For example:
> ta config --data_port=RJ45 --ip=192.168.0.100/24 --gw=192.168.0.1
> ta config --data_port=QSFP --ip=192.168.0.100/24 --gw=192.168.0.1
Configure the appliance. You can configure the appliance to use DHCP to obtain an IP address automatically, or you can configure the appliance to use a static IP address. If you have less data, then you may consider reducing the size of the data disk by specifying the required size. This will reduce the time to upload the data to cloud.
To configure the appliance, run the following command:
DHCP
ta config --data_port=PORT --ip=dhcp [--proxy_addr=123.45.67.89]
Replace
PORTwith the data port you are using on the appliance, eitherRJ45orQSFP.Optionally use the
--proxy_addrflag to specify a proxy server IP address for online transfers.
Static IP
ta config --data_port=PORT --ip=IP_ADDRESS/NETMASK --gw=GATEWAY_ADDRESS [--proxy_addr=123.45.67.89]
Replace the following:
PORT: The data port you are using on the appliance, eitherRJ45orQSFP.IP_ADDRESS: the IP address for the appliance, ordhcpfor automatic IP address configuration.NETMASK: The netmask in CIDR notation. Not required if you are using DHCP.GATEWAY_ADDRESS: The gateway IP address. Not required if you are using DHCP.If you do not want to use a gateway and only allow clients on the same subnet to connect to the Transfer Appliance, enter
--gw=0.0.0.0as theGATEWAY_ADDRESS.Optionally use the
--proxy_addrflag to add proxy support when you perform online transfers and enter the IP address for the appliance.
If you also want to resize the data disk, then use the following flag:
[--data_size=SIZE]
SIZE: The data size you want to specify eg:200T,30TiB.
The following sample response resembles the output that is returned:
Configuring, encrypting, and mounting data partition...
Verified partition settings for "/mnt/ta_metadata".
Partition key generated and encrypted.
Verifying partition settings and mounting data partition.
This may take several minutes to finish...
Mounted partition "/mnt/ta_data".
Verified partition settings for "/mnt/ta_data".
Data partition is mounted.
Mounting now permissible under "/mnt/ta_data_base/ta_mounts".
Customer fstab file "/opt/customer.fstab" created.
Network is configured.
Configured NFS share "/mnt/ta_data".
NFS share "/mnt/ta_data" is configured.

Appliance has been successfully configured. You can begin copying data.

Use these commands to mount the NFS share from your client:
> sudo mkdir /mnt/data
> sudo mount 192.168.0.100:/mnt/ta_data /mnt/data
Change appliance configurations
To change Transfer Appliance configurations, you can use the
ta config command as often as you need with alternate arguments to reconfigure
the settings on your appliance.
What's next
Optional: Set the Transfer Appliance to online mode.
Copy data to the Transfer Appliance.
