Manage features through metadata
This page describes how to manage some Vertex AI Workbench instance features by modifying the instance's metadata key-value pairs.
Metadata keys
For information about features and their respective metadata keys, see the following table.
| Feature | Description | Metadata key | Accepted values and defaults |
|---|---|---|---|
| Enables Cloud Storage FUSE on a container image |
Mounts |
container-allow-fuse |
|
| nbconvert |
Lets you export and download notebooks as a different file type. |
notebook-disable-nbconvert |
|
| Delete to trash |
Uses the operating system's trash behavior when deleting from JupyterLab. |
notebook-enable-delete-to-trash |
|
| Dataproc |
Enables access to Dataproc kernels. For more information, see Create a Dataproc-enabled instance. |
disable-mixer |
|
| Idle shutdown |
Enables idle shutdown. For more information, see Idle shutdown. |
idle-timeout-seconds |
An integer representing the idle time in seconds. The default value
is 10800 seconds (180 minutes).
|
| Scheduled OS patches |
Schedules automatic OS updates of the instance. This enables Debian's unattended upgrade service and only applies to VM-based images. |
install-unattended-upgrades |
|
| Custom Jupyter user |
Specifies the name of the default Jupyter user. This setting
determines the name of the folder for your notebooks. For example,
instead of the default |
jupyter-user |
A string. The default value is jupyter. |
| File downloading |
Lets you download files from JupyterLab. |
notebook-disable-downloads |
|
| Root access |
Enables root access. |
notebook-disable-root |
|
| Terminal access |
Enables terminal access. |
notebook-disable-terminal |
|
| Scheduled upgrades |
Schedules automatic upgrades of the instance. |
notebook-upgrade-schedule |
The weekly or monthly schedule that you set, in
unix-cron
format, for example, 00 19 * * MON means weekly on
Monday, at 1900 hours Greenwich Mean Time (GMT).
This feature is off by default.
|
| Post-startup script |
Runs a custom script after startup. |
post-startup-script |
The URI of a post-startup script in Cloud Storage, for example:
gs://bucket/hello.sh. This feature is off by default.
|
| Post-startup script behavior |
Defines when and how the post-startup script runs. |
post-startup-script-behavior |
|
| Report event health |
Checks health every 30 seconds for VM metrics. |
report-event-health |
|
Metadata managed by Compute Engine
Some of the metadata keys are predefined by Compute Engine. For more information, see Predefined metadata keys.
Protected metadata keys
Some metadata keys are reserved for system use only. If you assign values to these metadata keys, the new values will be overwritten by the system values.
Reserved metadata keys include and are not limited to:
data-disk-urienable-osloginframeworknotebooks-apinotebooks-api-versionnvidia-driver-gcs-pathproxy-urlrestrictionshutdown-scripttitleversion
Create an instance with specific metadata
You can create a Vertex AI Workbench instance with specific metadata by using the Google Cloud console, the Google Cloud CLI, Terraform, or the Notebooks API.
Console
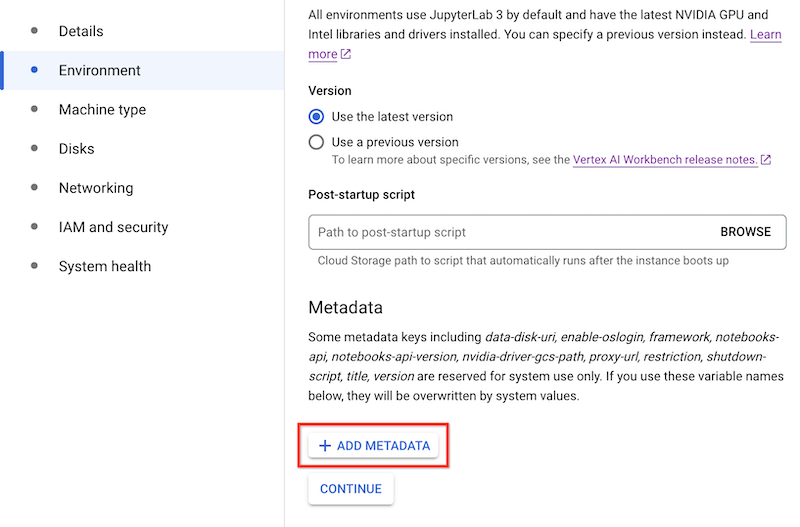
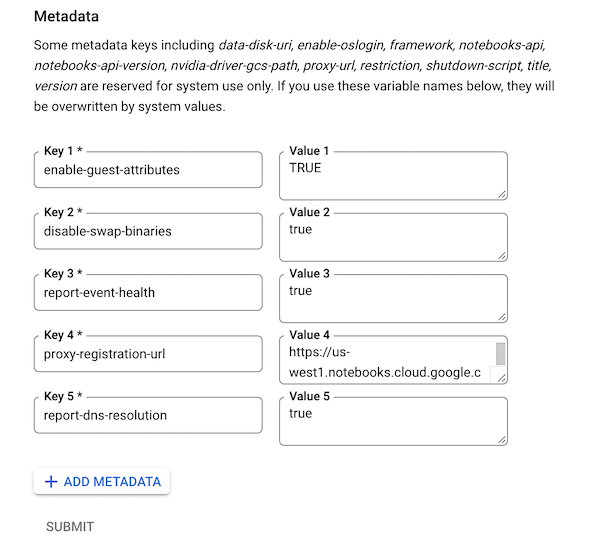
When you create a Vertex AI Workbench instance, you can add metadata in the Environment section of Advanced options.

gcloud
When you create a Vertex AI Workbench instance, you can add metadata by using the following command.
gcloud workbench instances create INSTANCE_NAME --metadata=KEY=VALUE
Terraform
To add metadata, create the resource with metadata key-value pairs.
To learn how to apply or remove a Terraform configuration, see Basic Terraform commands.
Notebooks API
Use the instances.create
method with metadata values to manage the corresponding features.
Update an instance's metadata
You can update the metadata of a Vertex AI Workbench instance by using the Google Cloud console, the Google Cloud CLI, Terraform, or the Notebooks API.
Console
You can update the metadata of a Vertex AI Workbench instance in the Software and security section on its Details page.

gcloud
You can update the metadata on a Vertex AI Workbench instance by using the following command.
gcloud workbench instances update INSTANCE_NAME --metadata=KEY=VALUE
Terraform
You can change the metadata key-value pairs to manage the corresponding features on Vertex AI Workbench instances.
To learn how to apply or remove a Terraform configuration, see Basic Terraform commands.
Notebooks API
Use the instances.patch
method with metadata values and gce_setup.metadata in the updateMask
to manage the corresponding features.
Remove metadata from an instance
You can remove metadata from a Vertex AI Workbench instance by using the Google Cloud console, the Google Cloud CLI, Terraform, or the Notebooks API.
Console
You can remove metadata from a Vertex AI Workbench instance in the Software and security section on its Details page.

gcloud
You can remove metadata from a Vertex AI Workbench instance by using the following command.
gcloud workbench instances update INSTANCE_NAME --metadata=KEY=
Terraform
You can remove metadata key-value pairs to manage the corresponding features of a Vertex AI Workbench instance.
To learn how to apply or remove a Terraform configuration, see Basic Terraform commands.
Notebooks API
Use the instances.patch
method with the metadata value set to an empty string and
gce_setup.metadata in the updateMask to remove the
corresponding feature.
